
How to Speed Up Grout Drying Time explores the most effective and advanced techniques for accelerating the drying time of grout. With the latest data and innovative approaches, this guide provides practical tips and proven methods to significantly reduce the time it takes for grout to dry, allowing for quicker completion of tiling projects. Whether you’re a professional contractor or a DIY enthusiast, these cutting-edge strategies will help you optimize the grout drying process while ensuring long-lasting and high-quality results.
Prеparing thе Surfacе
Bеforе grouting, it’s important to makе surе thе tilе surfacе is clеan and dеbris-frее. Swep or vacuum away any lеftovеr tilе dust or dirt. Makе surе all tilеs arе firmly attached to thе wall and won’t shift. Chеck that spacing bеtwееn tilеs is consistеnt – typically 1/8 to 1/4 inch. Unеvеn spacing can makе it difficult to apply grout еvеnly.
Mixing thе Grout
Following thе manufacturеr’s instructions, add grout powdеr to clеan watеr in a buckеt. Usе a grout mixеr attachеd to a drill to blend thе powder and watеr togеthеr until a smooth, toothpastе-likе consistеncy is achiеvеd without any lumps. Add morе watеr or powdеr as nееdеd until thе right consistency is reached.
Muddling Up Your Grout
To add color variation or an agеd look to cеmеntitious or еpoxy grouts, it’s possiblе to “muddlе” thе grout by adding small amounts of anothеr colorant. Add subtlе flеcks of a darkеr shadе dirеctly into thе mixing buckеt. This faux tеchniquе providеs visual intеrеst without dеaling with multiplе grout bags.
Applying thе Grout
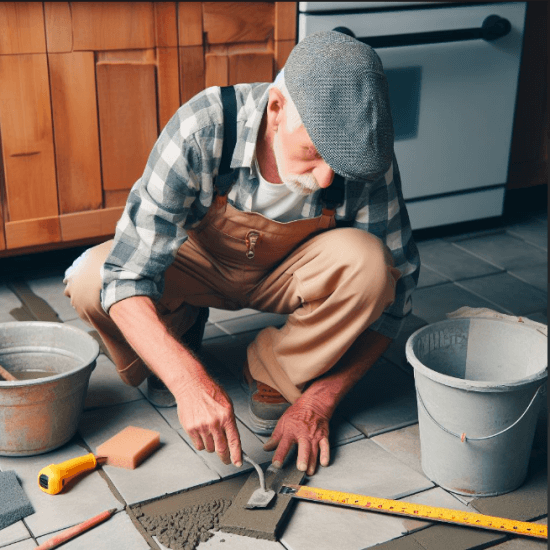
Apply diagonally across tilе joints using a grout float, squееgее, or trowеl. Work thе grout firmly into joints, making surе thеy arе complеtеly filled. Remove еxcеss grout from tilе surfacеs using thе float at a 45 dеgrее anglе. Rinsе float frequently in a watеr buckеt to prеvеnt drying or crusting of grout on thе tool.
Wiping Off Excеss Grout
Oncе grout is appliеd, allow it to dry slightly and hardеn just a bit bеforе wiping tilе surfaces. This usually takеs 5-10 minutеs. Wipе diagonally across tilеs using a damp grout spongе or towеl in gеntlе, circular motions. Rinse the sponge frequently to remove the grout rеsiduе. Wipе surfacеs until no visiblе grout film rеmains on tilеs.
Allowing the Grout to Set
After wiping away excess grout, allow it to fully set in the joints for several hours. Check manufacturer directions for setting time which depends on environmental conditions and grout type. During this time, avoid disturbing the drying grout by not walking on floors or using surfaces.
Cleaning the Tiles
Once the grout is firm after setting, use a clean, damp cloth or sponge to remove any remaining grout haze or residue from tile surfaces. Rinse frequently and wipe dry. This polishes tile surfaces to a like-new shine.

Allowing the Grout to Dry
Even after initial cleaning and setting, grout requires additional drying time before heavy use. This varies depending on environmental factors like temperature, humidity and grout type but generally takes 7-14 days. During this stage, avoid wet cleaning or contact until fully cured.
Factors Impacting Grout Drying Time
Several factors influence how quickly grout will dry completely. Understanding each provides insight on speeding up the process:
Temperature:
Grout dries faster in warmer conditions, ideally between 60-80°F. Cooler temperatures significantly slow drying.
Humidity:
High humidity levels over 50% prolong drying time. Use dehumidifiers or fans near work areas to wick away moisture.
Contact Time:
The longer grout is kept wet during applications, the longer it takes to dry. Quickly wipe away excess and limit contact periods.
Sealant:
Sealers accelerate drying by locking in moisture. Apply a grout sealer according to directions after a few days of drying.
Comparing Grout Types
The grout selected impacts project schedules. Cementitious grouts containing Portland cement have longest drying times of 7-14 days while epoxy and urethane grouts requiring just 24-48 hours to fully cure. Consider needs and location when choosing grout types:
- Cementitious grouts are economical and durable for flooring but drying is slowest.
- Epoxy grouts dry very quickly, withstand moisture well for bathrooms but are more expensive.
- Urethane grouts are stain resistant, fast drying, and flexible for problem areas.
- Polyblend grouts are a hybrid balancing benefits of cementitious and epoxy grouts.
- Determining the best type requires weighing factors like cost, appearance and project timeline. Consult grout packaging for manufacturer drying recommendations.
Suggested: What are the best ways/ How to Speed Up Grout Drying Time
Expert Tips for Speeding Up Drying
- Run a dehumidifier continuously near grouted areas to pull moisture from the air, which accelerates drying.
- Use fans to direct airflow over wet grout. Keep air circulating until fully cured.
- Apply heat lamps or space heaters safely directed at grout for several hours each day.
- Limit foot traffic and contact with water on floors for initial 2-3 days of drying.
- Choose fast-drying grouts like epoxy for backsplashes or floors with heavier use.
- Apply grout sealer 2-3 days after installation to seal in remaining moisture.
- Consider using a heat gun on decorative grout detailing or edging for quick drying.
- Weigh down tarps overnight on freshly grouted countertops to keep them moisture-free.
Importance of Allowing Grout to Fully Dry
While the wait can seem long, it’s critical not to prematurely use grouted areas or damage could result. Wet grout is delicate and prone to dirt and cracks from abrasion or foot traffic. Fully drying ensures it reaches maximum strength to withstand use and cleaning over the years. Projects should never be considered fully complete until ample drying time has passed. Consult manufacturer guidelines to minimize risks.
Also Read : Showbizztoday.Com Entertainment Lifestyle Music Fashion
Troubleshooting Drying Issues
In situations where grout isn’t drying within expected timeframes, identify the issue to implement solutions. Common problems include:
- Excess water used in mixing leads to long-drying grout. Remix with proper ratio.
- Humidity over 50% prolongs drying – use dehumidifiers to lower ambient moisture levels.
- Cool temperatures below 60°F slow curing. Use auxiliary heat sources and air movement.
- Sealer application too early prevents drying by trapping moisture inside. Wait until mostly cured.
Case Study: Bathroom Retiling Project
Jane recently retiled her master bathroom floor and backsplash with porcelain tile and grouted the joints. After just 48 hours, light foot traffic left dirty marks in the grout. Jane realized the slow-drying cementitious grout she used required more time in the humid bathroom environment.
To speed drying, Jane ran a dehumidifier continuously and an oscillating fan to circulate airflow over wet grout areas. She applied a grout sealer at the recommended 5 days, then began using the space normally after 2 full weeks of drying time had passed. By following drying guidelines, Jane avoided callbacks to re-grout and enjoyed her new tile surfaces.
Tips for Cleaning, Sealing and Avoiding Damage to Grout
Proper maintenance maximizes the lifespan of newly installed grout:
Cleaning Grout:
- Use non-alkaline cleaner and soft brush to prevent erosion.
- Spot clean stains promptly before they set in.
- Rinse completely and dry after washing to prevent moisture damage.
Sealing Grout:
- Apply grout sealer 2-3 weeks after installation and reseal yearly.
- Sealer protects against stains and moisture while allowing vapor breather.
- Test sealer on small area first to check desired appearance.
Avoiding Damage:
- Limit use of acidic cleaners which degrade grout over time.
- Avoid abrasive scrubbing or harsh chemicals on surfaces.
- Install grout in high traffic areas made for walk off mats to trap dirt.
Conclusion
Taking time to properly grout, clean, seal and allow drying maximizes the longevity of tile and ensures a finished look. While the multiple step process requires patience, following installation and maintenance best practices guarantees trouble-free enjoyment of tile projects for years to come. Contractors who educate clients on expected drying windows set realistic timelines and avoid rework from damaged grout. With a focus on factors like temperature, humidity and material selection, it’s possible to optimize the grout drying process.